New Photoshop CS6 Color Splash Basic Tutorial
Photoshop is a image editing software that gives you the power to edit your image with an ease. You can crop the image, change the backgro...
https://things-for-students.blogspot.com/2013/09/new-photoshop-cs6-color-splash-basic.html
Photoshop is a image editing software that gives you the
power to edit your image with an ease. You can crop the image, change the
background of the image, transform the shape of the image and can create an animated
(.gif) image.
So today in this tutorial I am going to show you the tutorial
of how you can add a color splash effect in your image.
I have attached a PSD file with this tutorial so that you
can try it easily. Download PSD file from here.
Follow these simple steps to add a color splash effect on your Image.
Step 1: Open Photoshop and drag and drop an image for
editing. You can also import an image from file menu.
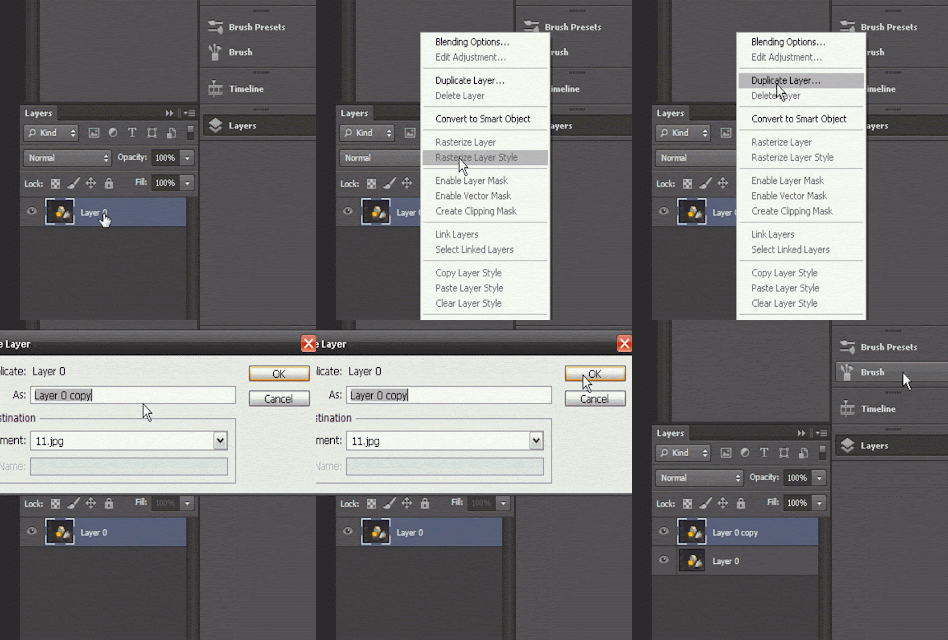
Step 3: Now right click on the “layer 0” and click on
“Duplicate Layer…”. A box will appear and change nothing to it and press ok
button.
Step 4: Now we will transform the “Layer 0 Copy” into a
black and white image. To do that go to image option in the menu bar and select
”Adjustments” and then click black and white. Use default setting and click ok.
[ You can also use the keyboard shortcut : Alt+Shift+Ctrl+B ]
Step 5: Now we will again work on the “Layer 0 Copy” . Make
sure this layer is selected. Now we will make the yellow Yolk part visible. To
do that select the “Eraser tool” from the tool box (Change the eraser size and
shape for smooth erasing) and erase the Yolk part from the black and white
image.


